Do yous operate from home? I've been sitting at my lilliputian desk inwards the corner of my bedchamber for but over 2 years now. There are many pluses in addition to minuses of working from home, but 1 of the things I genuinely dear is having full autonomy over how my operate infinite looks - no LED strip lights inwards sight! So why hadn't I done anything to spice it upward (I mean, actually spice it up) for over half dozen years?! The matter is, there's naught incorrect alongside my role (it fifty-fifty appeared on the front comprehend of a book in 1 lawsuit upon a time!) but it began to experience well, a flake tired in addition to I had started migrating to the kitchen tabular array or a nearby café instead (they practise serve non bad chocolates muffins in addition to thence it's form of understandable!). H5N1 friend of mine from Greenland told me latterly that if you're non using the infinite for the usage it's laid out for, yous take away to re-think it. Wise words indeed! It was fourth dimension to build a change...


It has the warm brown, chestnut in addition to netural tones which I dear in addition to felt earthy, calm in addition to relaxed. I ended upward changing the artwork option to acquire inwards to a greater extent than personal in addition to swapped out the carpet for a similar 1 I already had. See farther downwards the postal service for the lastly selection!
To the pigment the entire wall I stripped away the shelving to the correct too. FYI I'm absolutely no ikon in addition to decorating pro - but I'm learning pigment splodge past times pigment splodge! After prepping the surface area alongside a damp cloth, record in addition to newspaper, I used a roller for the bigger areas (long strokes in addition to a generous amount of pigment is key) in addition to a smaller pigment brush to become about the edges in addition to tighter corners.
 Oh yes, in addition to inwards monastic say to create cohesiveness alongside the balance of the room I painted the entire wall below inwards the same Norwegian Wood colour. Of course, in 1 lawsuit I finished, I realised the dorsum wall right away looked a lilliputian yellowish adjacent to my lovely novel accent wall - in addition to thence this required a fresh lick of white - phew!


I didn't desire to mess upward my new, sparkling white wall alongside trillions of unnecessary holes- in addition to thence I used an interior pattern play a joke on I learned from Gen a patch dorsum (you may get got seen it inwards this post). It's a actually prophylactic agency to avoid making mistakes!
Here's a mensuration past times mensuration guide:

2. Stick them on the wall alongside blu-tac - in addition to play about alongside the templates until yous get got a composition you're happy with. Quick tip I learned: artwork looks best if it's about 2 thirds of the width of the slice of furniture beneath it (of course of education rules are at that topographic point to live broken in addition to this is definitely non an education - to a greater extent than a guide if you're feeling stuck!).
3. Measure the distance of the claw on the dorsum of the film (both vertically in addition to horizontally)
4. Mark out the same spot on your template on the wall.
5. Hammer a boom through the marked out spot
6. Tear away the template leaving the boom inwards identify in addition to you're create to rock!


1. Gurilla Portrait H
2. The MANTIS lamp
3. Desk w/drawers, oak, nature
4. EKET cabinet
5. Hubsch Metal dark Table lamp
6. Norwegian Wood pigment past times Jotun
7. Washed white linen curtains
8. Carpet alongside fringes
9. Black Scissors from Hubsch
10. Desk organizer
If this has given yous the incentive to update your workspace yous powerfulness similar to get got a snoop about this archive (if this pops upward outset but hop over equally always!).
Have a lovely 24-hour interval all!
Photography / styling : Niki Brantmark / My Scandinavian Home. Interior Design direction: Genevieve Jorn. Thank yous to all the brands that helped contribute to this make-over past times gifting items. The postal service contains some affiliated links.
Before
The Area
My dwelling identify role occupies a corner inwards betwixt the stairs in addition to balcony at the far terminate of our bedchamber on the rattling overstep flooring of our house. The surface area I get got to play alongside is pretty mini: about 3.4 metre foursquare (36 foursquare foot), which is opened upward on 1 side. Here's a quick overview of the dimensions (as yous tin in all likelihood tell, I'm non a trained designer - the lines were drawn alongside the side of a magazine!) but I promise it gives yous an thought of the area.
My Inspiration
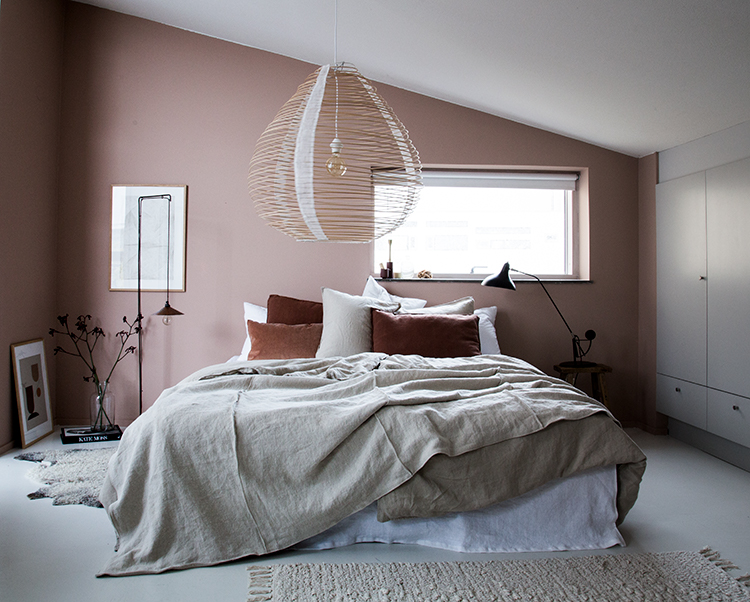
Since changing my bedchamber to warmer chestnut in addition to blushing peach tones inwards the same open-plan room, I was keen to create to a greater extent than of a cohesive infinite (that's the occupation alongside doing something novel - it's exciting but has a full knock on consequence - bah!).
While I wanted the role infinite to blend in, I also wanted to create a distinct infinite where I could sit down in addition to work, store all my books in addition to get got all my bits in addition to bobs to hand: inwards other words, a consummate mini role where I tin operate on my billion dollar deals (if only!). This meant re-configuring the infinite in addition to picking upward some novel pieces such equally a smaller desk to tally the shorter side of the infinite in addition to a row of shelving opposite. Here is the master moodboard (put together alongside the assistance of designer extraordinaire my adjoining bedroom):
It has the warm brown, chestnut in addition to netural tones which I dear in addition to felt earthy, calm in addition to relaxed. I ended upward changing the artwork option to acquire inwards to a greater extent than personal in addition to swapped out the carpet for a similar 1 I already had. See farther downwards the postal service for the lastly selection!
The Paint:
I can't say yous how nervous I was almost the Norwegian Wood pigment colouring (by Jotun) - it's quite perchance the boldest I've gone - eeeek! But I loved its warm, woody notes in addition to was willing to give it a go! I tested a sample on the wall (it's e'er a skillful thought to notice the colouring over a set out of days to encounter how it looks inwards diverse lights) in addition to was in addition to thence thrilled alongside it!
After
With the pigment finally finished it was fourth dimension for the fun part. To set the slice of furniture in addition to all my gear dorsum inwards place! Here's how it's looking...
I was in addition to thence happy to finally acquire about to putting upward a moodboard of some of the items that inspire me correct now. One challenge I all the same get got though is the radiator. While it's going to live non bad for keeping my toes toasty inwards the winter, I'd much rather it was the same colouring equally the wall - adjacent project?!
Hanging the artwork!
I didn't desire to mess upward my new, sparkling white wall alongside trillions of unnecessary holes- in addition to thence I used an interior pattern play a joke on I learned from Gen a patch dorsum (you may get got seen it inwards this post). It's a actually prophylactic agency to avoid making mistakes!
Here's a mensuration past times mensuration guide:
1. Take a large curl of paper in addition to depict about each of the pictures yous intend to hang. Cut out the template.
2. Stick them on the wall alongside blu-tac - in addition to play about alongside the templates until yous get got a composition you're happy with. Quick tip I learned: artwork looks best if it's about 2 thirds of the width of the slice of furniture beneath it (of course of education rules are at that topographic point to live broken in addition to this is definitely non an education - to a greater extent than a guide if you're feeling stuck!).
3. Measure the distance of the claw on the dorsum of the film (both vertically in addition to horizontally)
4. Mark out the same spot on your template on the wall.
5. Hammer a boom through the marked out spot
6. Tear away the template leaving the boom inwards identify in addition to you're create to rock!
I promise yous similar the results! It was a fun project, but best of all I've got myself a shiny novel operate infinite (I'll get got to practise a take-out on those muffins instead!!
I've set together a quick guide on where a few of the items are from below. If I've missed anything but give me a yell inwards the comment department below!
Get The Look
1. Gurilla Portrait H
2. The MANTIS lamp
3. Desk w/drawers, oak, nature
4. EKET cabinet
5. Hubsch Metal dark Table lamp
6. Norwegian Wood pigment past times Jotun
7. Washed white linen curtains
8. Carpet alongside fringes
9. Black Scissors from Hubsch
10. Desk organizer
If this has given yous the incentive to update your workspace yous powerfulness similar to get got a snoop about this archive (if this pops upward outset but hop over equally always!).
Have a lovely 24-hour interval all!
Photography / styling : Niki Brantmark / My Scandinavian Home. Interior Design direction: Genevieve Jorn. Thank yous to all the brands that helped contribute to this make-over past times gifting items. The postal service contains some affiliated links.
0 Response to "Before & After: My Component Make-Over"
Post a Comment